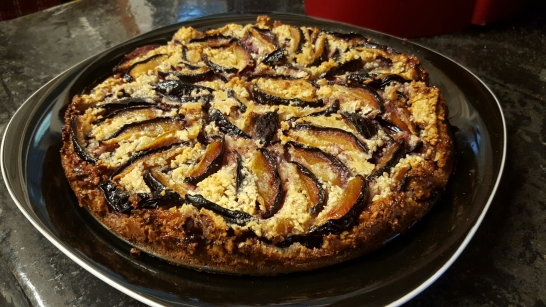
Italian Plum Cake

Last month in our Fresh Fork basket we received some Stanley plums (aka “Italian plums”). I had no idea how I was going to use them and I knew that my husband wouldn’t eat all of them as I am the pickiest of picky when it comes to fruit. No, really. The list of fruits I don’t like is much longer than the list of fruits that I actually do like. Granted, I’ve come a long way from my childhood where I would eat only apples, grapes, and raspberries – but I still have a ways to go.

We were invited to my inlaws’ house one night for dinner back in September and I needed to throw something together last minute to bring along and share. I settled on this plum cake, as I haven’t really cooked much with fruit and needed to use these plums. Plus, my husband loves cake – so why not?

Italian Plum Cake

adapted from Serious Eats

  • 1 cup unblanched almonds
  • 1/2 cup sugar, plus another 1/4 cup for topping
  • 1/3 cup all-purpose flour
  • 1/8 teaspoon salt
  • 2 eggs
  • 1/2 cup milk
  • 4 tbsp unsalted butter, melted
  • 2 lbs Italian plums, pitted and sliced (I used about a quart)
  1. Preheat the oven to 350ºF. Butter the surface of a 10-inch tart pan or springform pan.
  2. Put the almonds and 1/2 cup sugar in a blender or food processor and pulse until the nuts are finely ground. Add the flour and salt and pulse once more. Transfer the mixture to a bowl.
  3. In a separate bowl, whisk the eggs and milk together. Stir in the melted butter. Add this mixture to the bowl of dry ingredients and whisk until the batter becomes nice and smooth.
  4. Pour the batter into the pan and smooth with a spatula. Arrange the plum slices on top on a circular pattern. Sprinkle sugar generously over the plums. Bake for 40 to 45 minutes, until the top is golden and a pairing knife inserted into the center comes out clean.
  5. Serve warm, with a scoop of vanilla ice cream if desired.

image

This cake was, for lack of a better word, devoured. There was not a piece left to take home and a pint of ice cream was a perfect accompaniment to the cake. The almonds and sugar take the sweetness of the plums to the next level…and well, who doesn’t love cake? I was very proud to have made a dessert that was a win with not only family but myself included! I intend to make this again next fall when Italian/Stanley plums are in season.
Strawberry-Rhubarb Crisp

As you saw from the first CSA of the summer, I received a bundle of rhubarb and had no idea what to do with it. After a bit of thinking and a purchase of a quart of strawberries from the market, I decided to go with the ‘strawberry-rhubarb’ route and make a dessert. I know, I know – desserts on this blog are (sadly) few and far between.

I decided to research crumbles and crisps to see what I could come up with, especially with not having a lot of ‘extra’ ingredients on hand in my pantry. All I needed to buy for this recipe was some quick oats – and since I needed to go to the store to get coffee anyways, I could easily get my hands on the exact amount I needed from their bulk ingredient section. We all know I have to have my coffee…so I consider this a win.

ANYWAYS – here’s a dessert for anyone who is holding on to the tail end of strawberry and rhubarb season tightly. I admit, it does have a lot of sugar in it…but it’s well worth it when it’s all done baking.

Old-Fashioned Strawberry-Rhubarb Crisp

from Food & Wine

For the Filling:

  • 2 lb rhubarb stalks, sliced into small 1/2 inch pieces
  • 1 1/4 cups sugar
  • 1 lb strawberries, hulled & quartered
  • 3 tbsp cornstarch
  • 2 tsp lemon juice
  • 1 tsp vanilla extract

For the Topping:

  • 1 stick (or 4 oz) unsalted butter, softened
  • 1 1/2 cups light brown sugar
  • 1 1/2 cups all-purpose
  • 1 1/4 cups quick oats
  • 3 tbsp canola oil
  • 1 1/2 tsp cinnamon
  • 3/4 tsp salt
  1. Make the topping: Combine all of the topping ingredients into a medium bowl. Use the dough hook on your KitchenAid mixer, a pastry blender, or your fingers, to mix everything together until large crumbs form. You CAN make this a day ahead of time and refrigerate overnight; make sure you bring it to room temperature before using.
  2. Preheat the oven to 375*. In a bowl, toss the rhubarb and 3/4 cup of the sugar, and let it stand for 15 minutes (stirring occasionally). In another bowl, toss the strawberries with the remain 1/2 cup sugar and let stand for 10 minutes, also stirring occasionally.
  3. Using a slotted spoon, transfer the rhubarb to the strawberries and discard any rhubarb juice. Add the rest of the filling ingredients and stir to combine. Transfer the mixture to a 9×13 glass baking dish.
  4. Sprinkle the crumb topping evenly over the filling and bake for 30 minutes. Then, turn the temperature down to 325* and bake for an additional 25-30 minutes. The filling should be nice and bubbly and the topping browned.
  5. Remove from oven and let the crisp rest for at least 10 minutes before serving.
  6. SERVE WARM WITH VANILLA ICE CREAM.

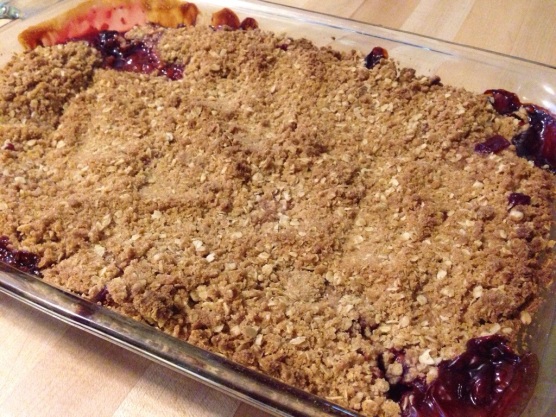
20140706-115315-42795941.jpg

This dessert really hit the spot on a warm, humid summer night. It’s not the most healthy dessert out there, but it’s great for a crowd or cookout. Don’t let the rhubarb scare you, either – there’s enough sugar in this recipe to cut the tartness. If the texture of rhubarb bothers you, make sure you chop it into small enough pieces.

As Step #6 states  – you have to eat it with vanilla ice cream. It just isn’t the same without (trust me, I tried). You’ll be glad you did!


Chocolate Butterscotch Chip Cookies

For the past several months, I’ve had a small container of butterscotch chips in my pantry, just waiting to be used up. I bought them to make butterscotch chip pancakes one morning (idea taken from the Pancake House) and only made them a handful of times – not nearly enough times, though, to go through an entire bag of chips. Let me tell ya – they’re awesome. If you like chocolate chip pancakes, you’ll love butterscotch pancakes.

And the sugar high that may or may not come from them 😉

Anyways, the change in the weather and the drop in temperature gets me all excited for baking. I don’t bake very much, mind you – but when I do, it’s usually in the wintertime. Especially during the holiday season. Lately, however, I’ve realized that part of the gloriousness of baking comes from the fact that the oven helps to keep your house warm on an especially chilly winter night. Then again…the smells are pretty nice, too!

To use up both the container of butterscotch chips and the 1/6 of a bag of chocolate chips that I had left in my pantry (how I ended up not using an entire bag of chocolate chips over the past few months, I don’t know!), I made these cookies. I found the recipe online and simply added my own amounts of chocolate chips & butterscotch chips.

Chocolate Butterscotch Chip Cookies

Slightly adapted from Stuck on Sweet

  • 3/4 cup unsalted butter, softened
  • 3/4 cup brown sugar
  • 1/4 cup granulated sugar
  • 1 egg
  • 2 tsp vanilla extract
  • 2 cups all-purpose flour
  • 2 tsp cornstarch
  • 1 tsp baking soda
  • 1/2 tsp salt
  • chocolate chips – about 1/2 to 3/4 cup
  • butterscotch chips – about 1/2 to 3/4 cup
  1. Preheat oven to 350*.
  2. In a bowl, cream together the butter & sugars. Add the egg and vanilla, and blend in.
  3. In a separate bowl, mix the flour, starch, soda & salt. Once it is combined, add the chips in, little by little.
  4. Using a tablespoon, drop the dough onto a baking sheet (I lined my cookie sheets with parchment paper). 
  5. Bake for 8-10 minutes, until the edges just start to turn a golden brown.
  6. Remove from oven and let the cookies cool on the sheet for 5 minutes, so they ‘set’ . Remove and let cool completely on a wire rack or plate.

20131124-175642.jpg

I have to admit that these cookies vanished pretty quickly. They were chewy, sweet, and such a great combination of chocolate & butterscotch. Yum!

One thing to note about the recipe is the cornstarch. I had never baked cookies with cornstarch as an ingredient before, but have read on countless blogs that it’s a great ingredient that makes the cookies so light & chewy. 

If you’re a fan of the chocolate & butterscotch combination, or are looking for a new cookie to try, or have butterscotch chips taking up real estate in your pantry for too long…look no further. 

Truthfully, they’re so good, I may have to go buy another bag of butterscotch chips…

Iced Pumpkin Cookies

You may recall that we received a small pumpkin in our CSA in the last few weeks of its run. It sat outside on our stoop with our larger pumpkins & looked nice and pretty for October. After Halloween though, it became fair game for any human or animal to consume (we had one pumpkin fall victim to some sort of wild animal – it chewed a hole right through it!). Thus I decided to bring it into the house to see if we could bake something with it.

I followed Sarah’s directions on how to take apart & cook pumpkin. Instead of canning it, I put it into a plastic container, since I knew I would be using it within the week. Her directions made the pumpkin dissection easier than how I had done it before. I’m thankful that now I have the knowledge for processing pumpkin, and probably won’t ever have to buy canned pumpkin again if I can help it.

We used the pumpkin up in some pumpkin cookies; a team effort of both the Hubs and I.

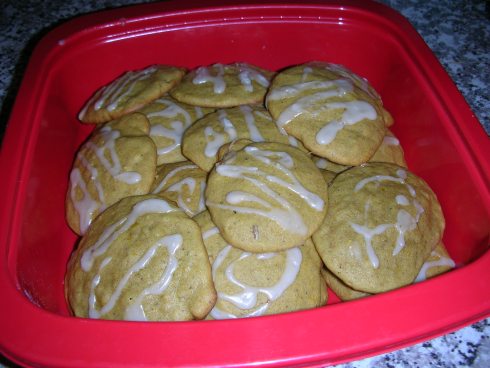
Iced Pumpkin Cookies – adapted from Allrecipes.com

Cookies:

  • 2.5 cups all-purpose flour
  • 1 tsp baking powder
  • 1 tsp baking soda
  • 2 tsp cinnamon
  • 1/2 tsp ground nutmeg
  • 1/2 tsp ground cloves
  • 1/2 tsp salt
  • 1 stick butter, softened
  • 1.5 cups white sugar
  • 1/2 small pie pumpkin, pureed (about 1 cup)
  • 1 egg
  • 1 tsp vanilla extract
  1. Preheat oven to 350*. Combine flour & spices; set aside.
  2. In a large bowl, cream together the butter & sugar. Add pumpkin, egg, & vanilla. Beat until creamy. Gradually add in dry ingredients & mix well.
  3. Drop on cookie sheet in tablespoonfuls.
  4. Bake 15-20 minutes. Makes quite a few cookies (I forgot to count)
  5. One the cookies have completely cooled, frost with icing:
    • 1 cup confectioners’ sugar
    • 1.5 tbsp milk
    • 1/2 tbsp butter
    • 1/2 tsp vanilla
    • *Mix the ingredients together in a plastic baggie. Cut off the tip of one end – easy DIY icing bag!

Don’t store the cookies like this. The icing will melt away. Oops!

The house smelled absolutely heavenly while these were baking! I highly recommend these to anyone who wants to try cooking with pumpkin.

For the sake of our waistlines, Hubs brought one tub of cookies to work, and we kept the others. These were especially good – however, they only keep for about a week; after that, they start to dry out. Which in our house, usually means one thing: I didn’t eat nearly enough of them! 🙂